Orient Express Tutorial
How to simulate Laue diffraction pattern using OrientExpress?
Laue diffraction is a method to find the crystallographic direction of single crystals. We shine the single crystal with white x-ray (having a continuous range of wavelength), and record the diffracted pattern on a x-ray film or image plate. Analyzing the pattern, we learn about the crystal structure. Sometimes we need to compare the observed pattern with a simulated pattern to identify a crystallographic plane. Here is how we can simulate the Laue pattern of a single crystal. This tutorial is meant for the first-time users.
- Download OrientExpress here and unzip in a Windows computer. Click OrientExpress.exe to launch the program. Below is the Main Window you will see once you launch OrientExpress.
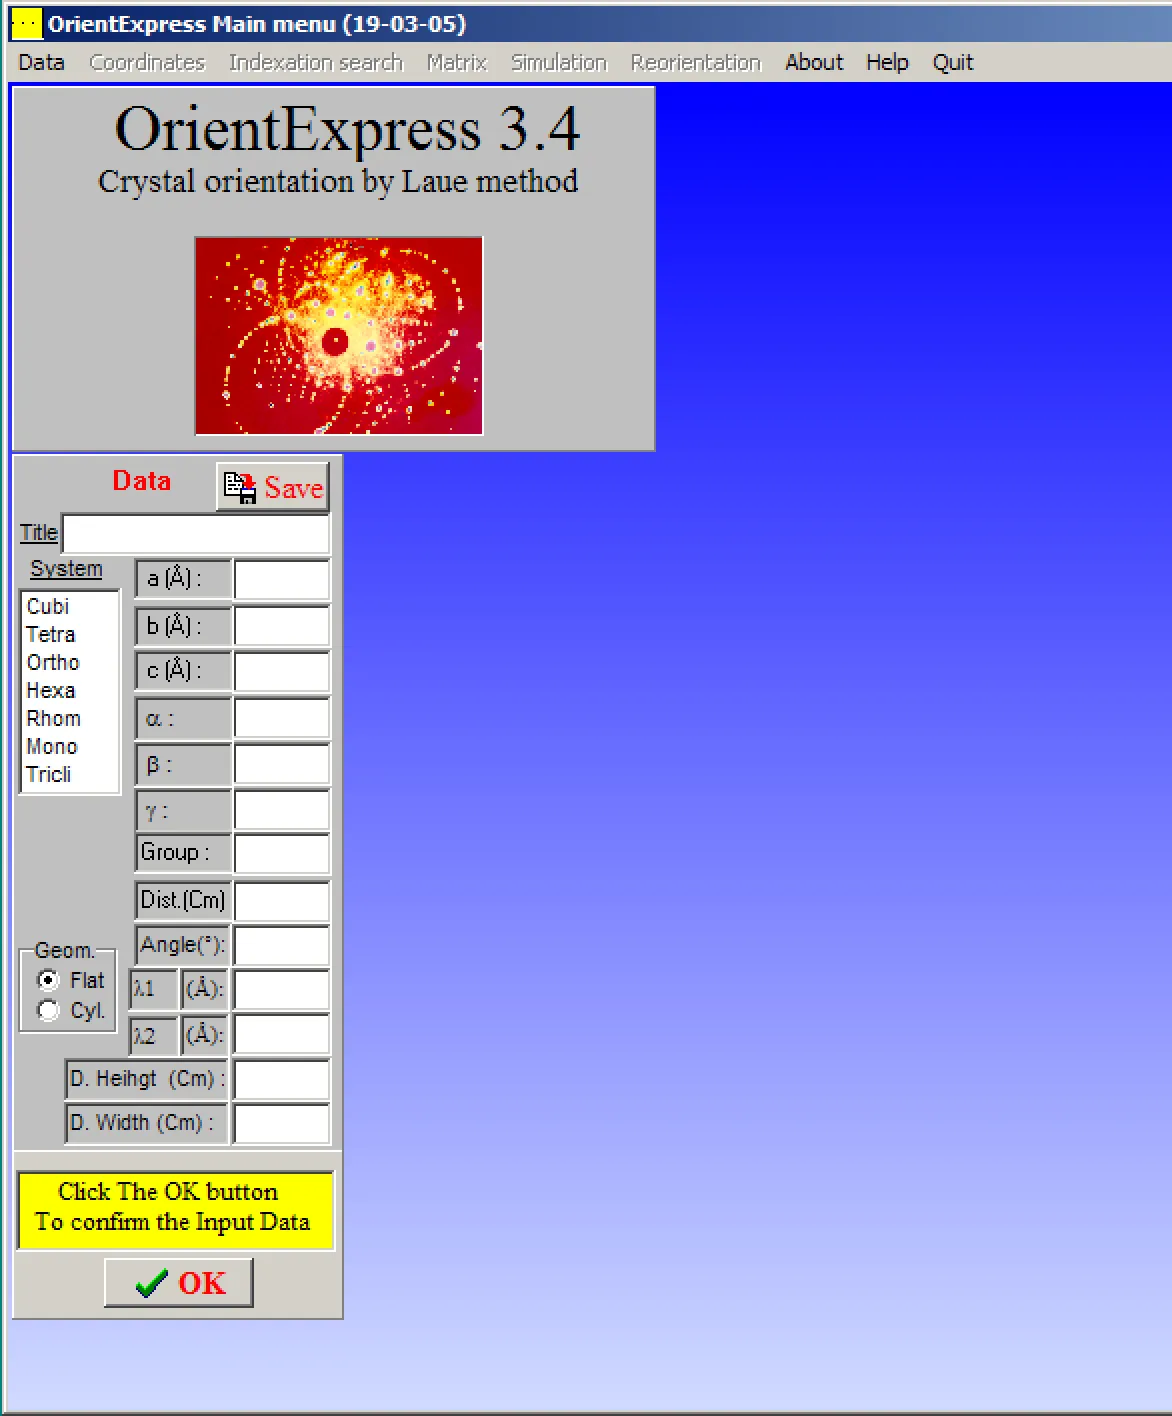
- To simulate Laue pattern of a single crystal, we need to insert the required parameter in OrientExpess. We can choose to insert the parameter manually. Go to menu bar Data » Keyboard. You will see following window:
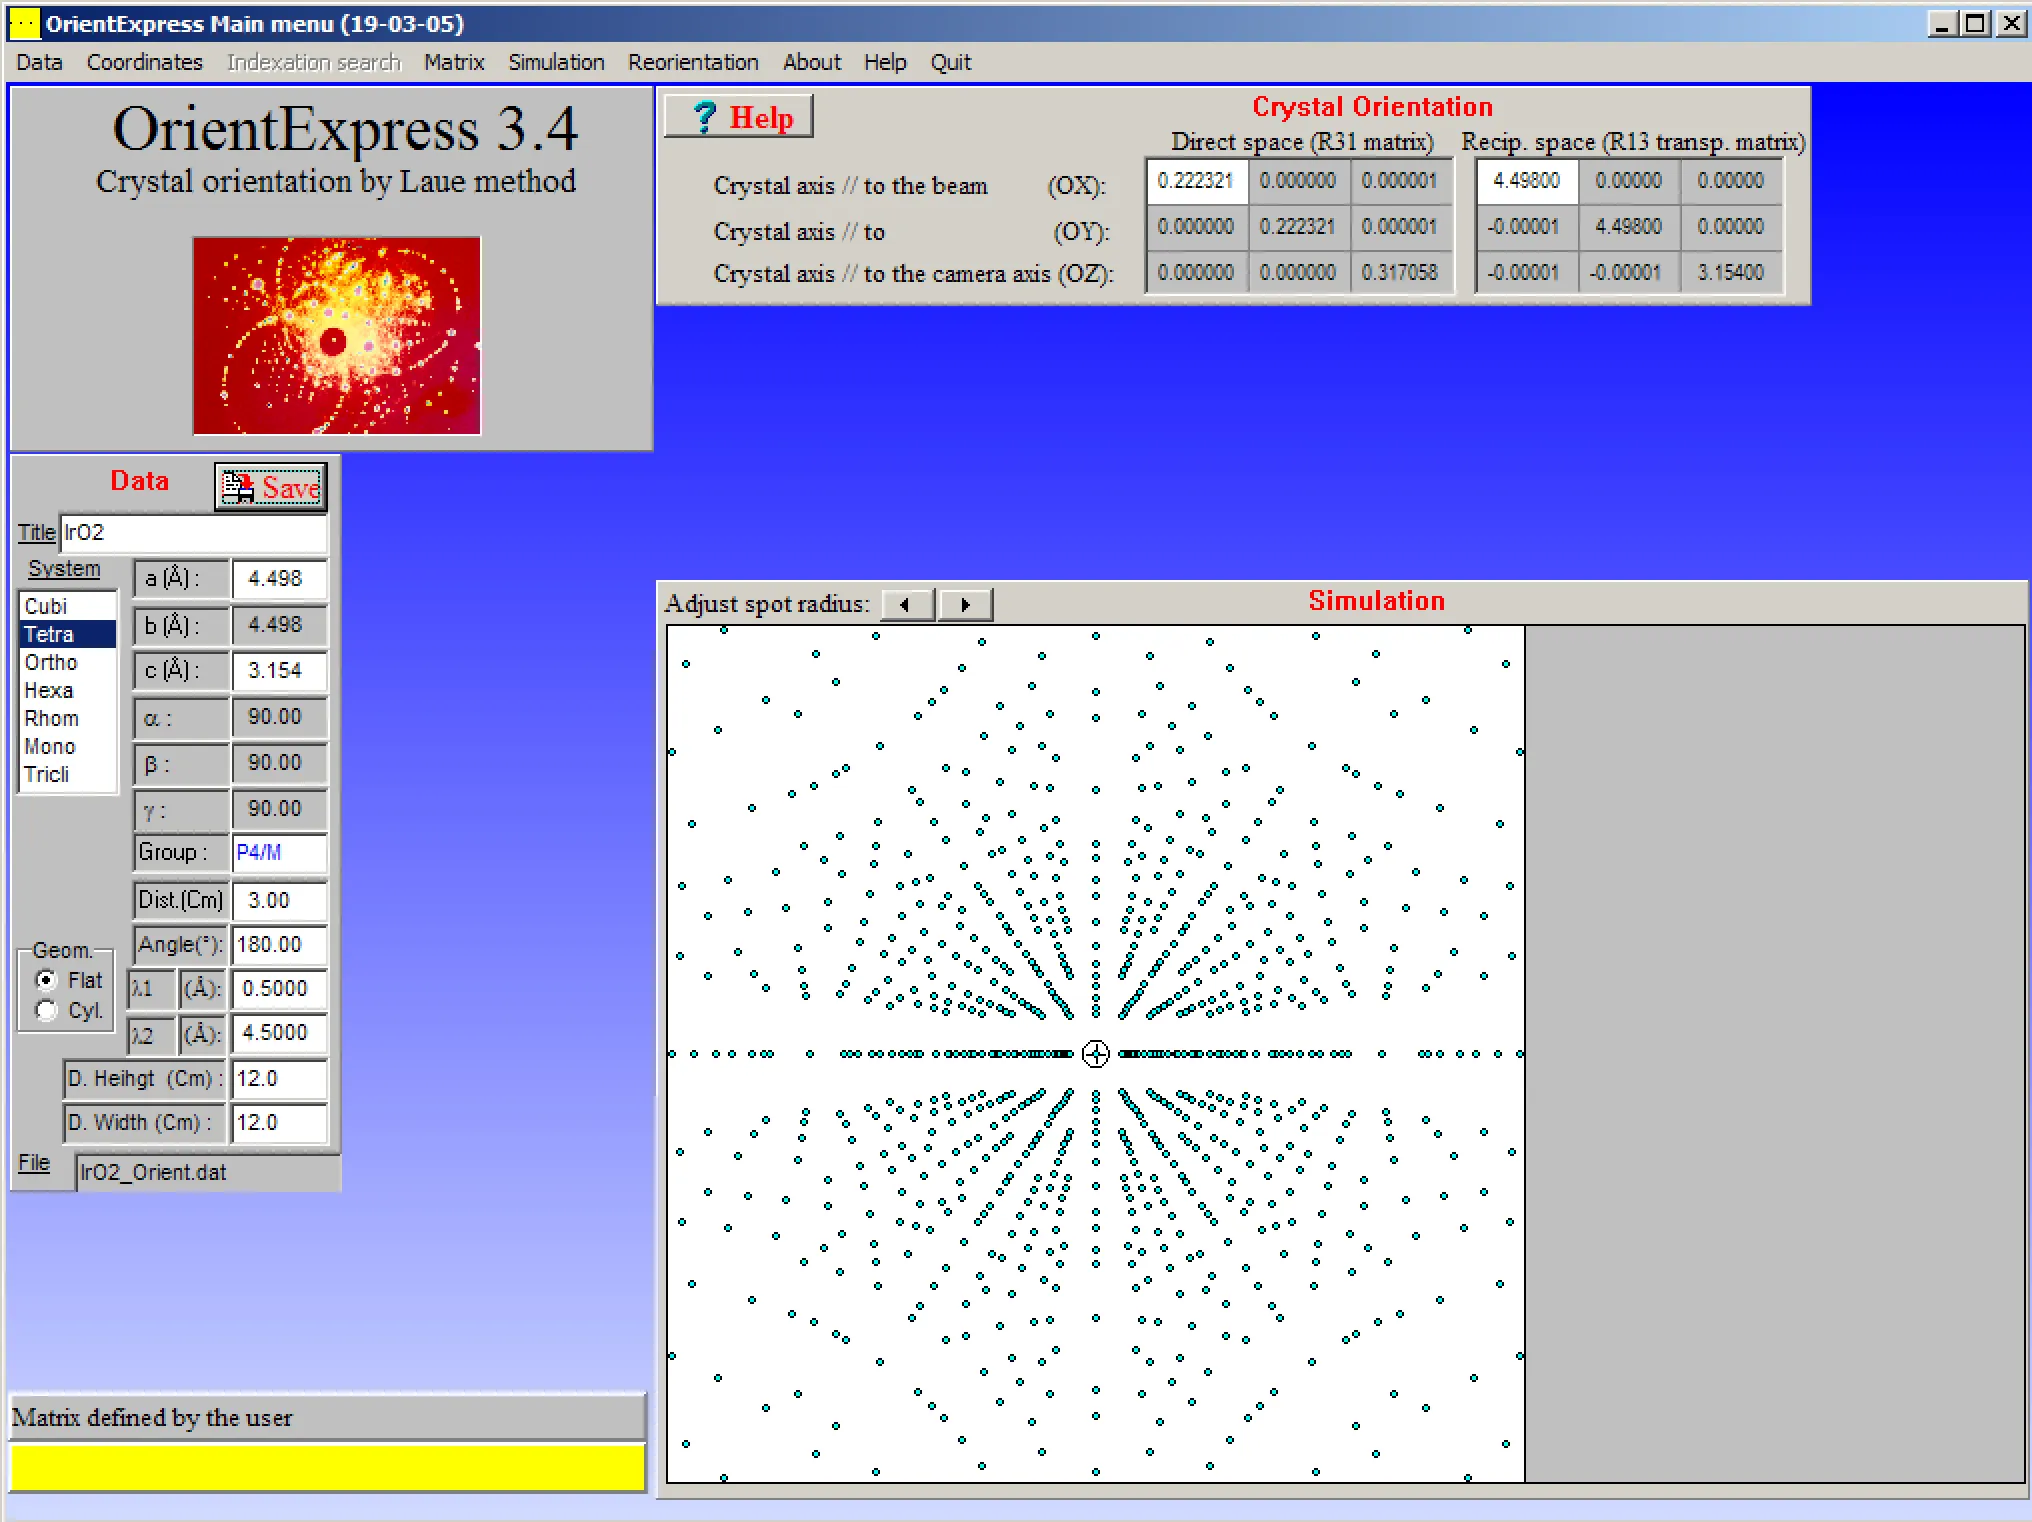
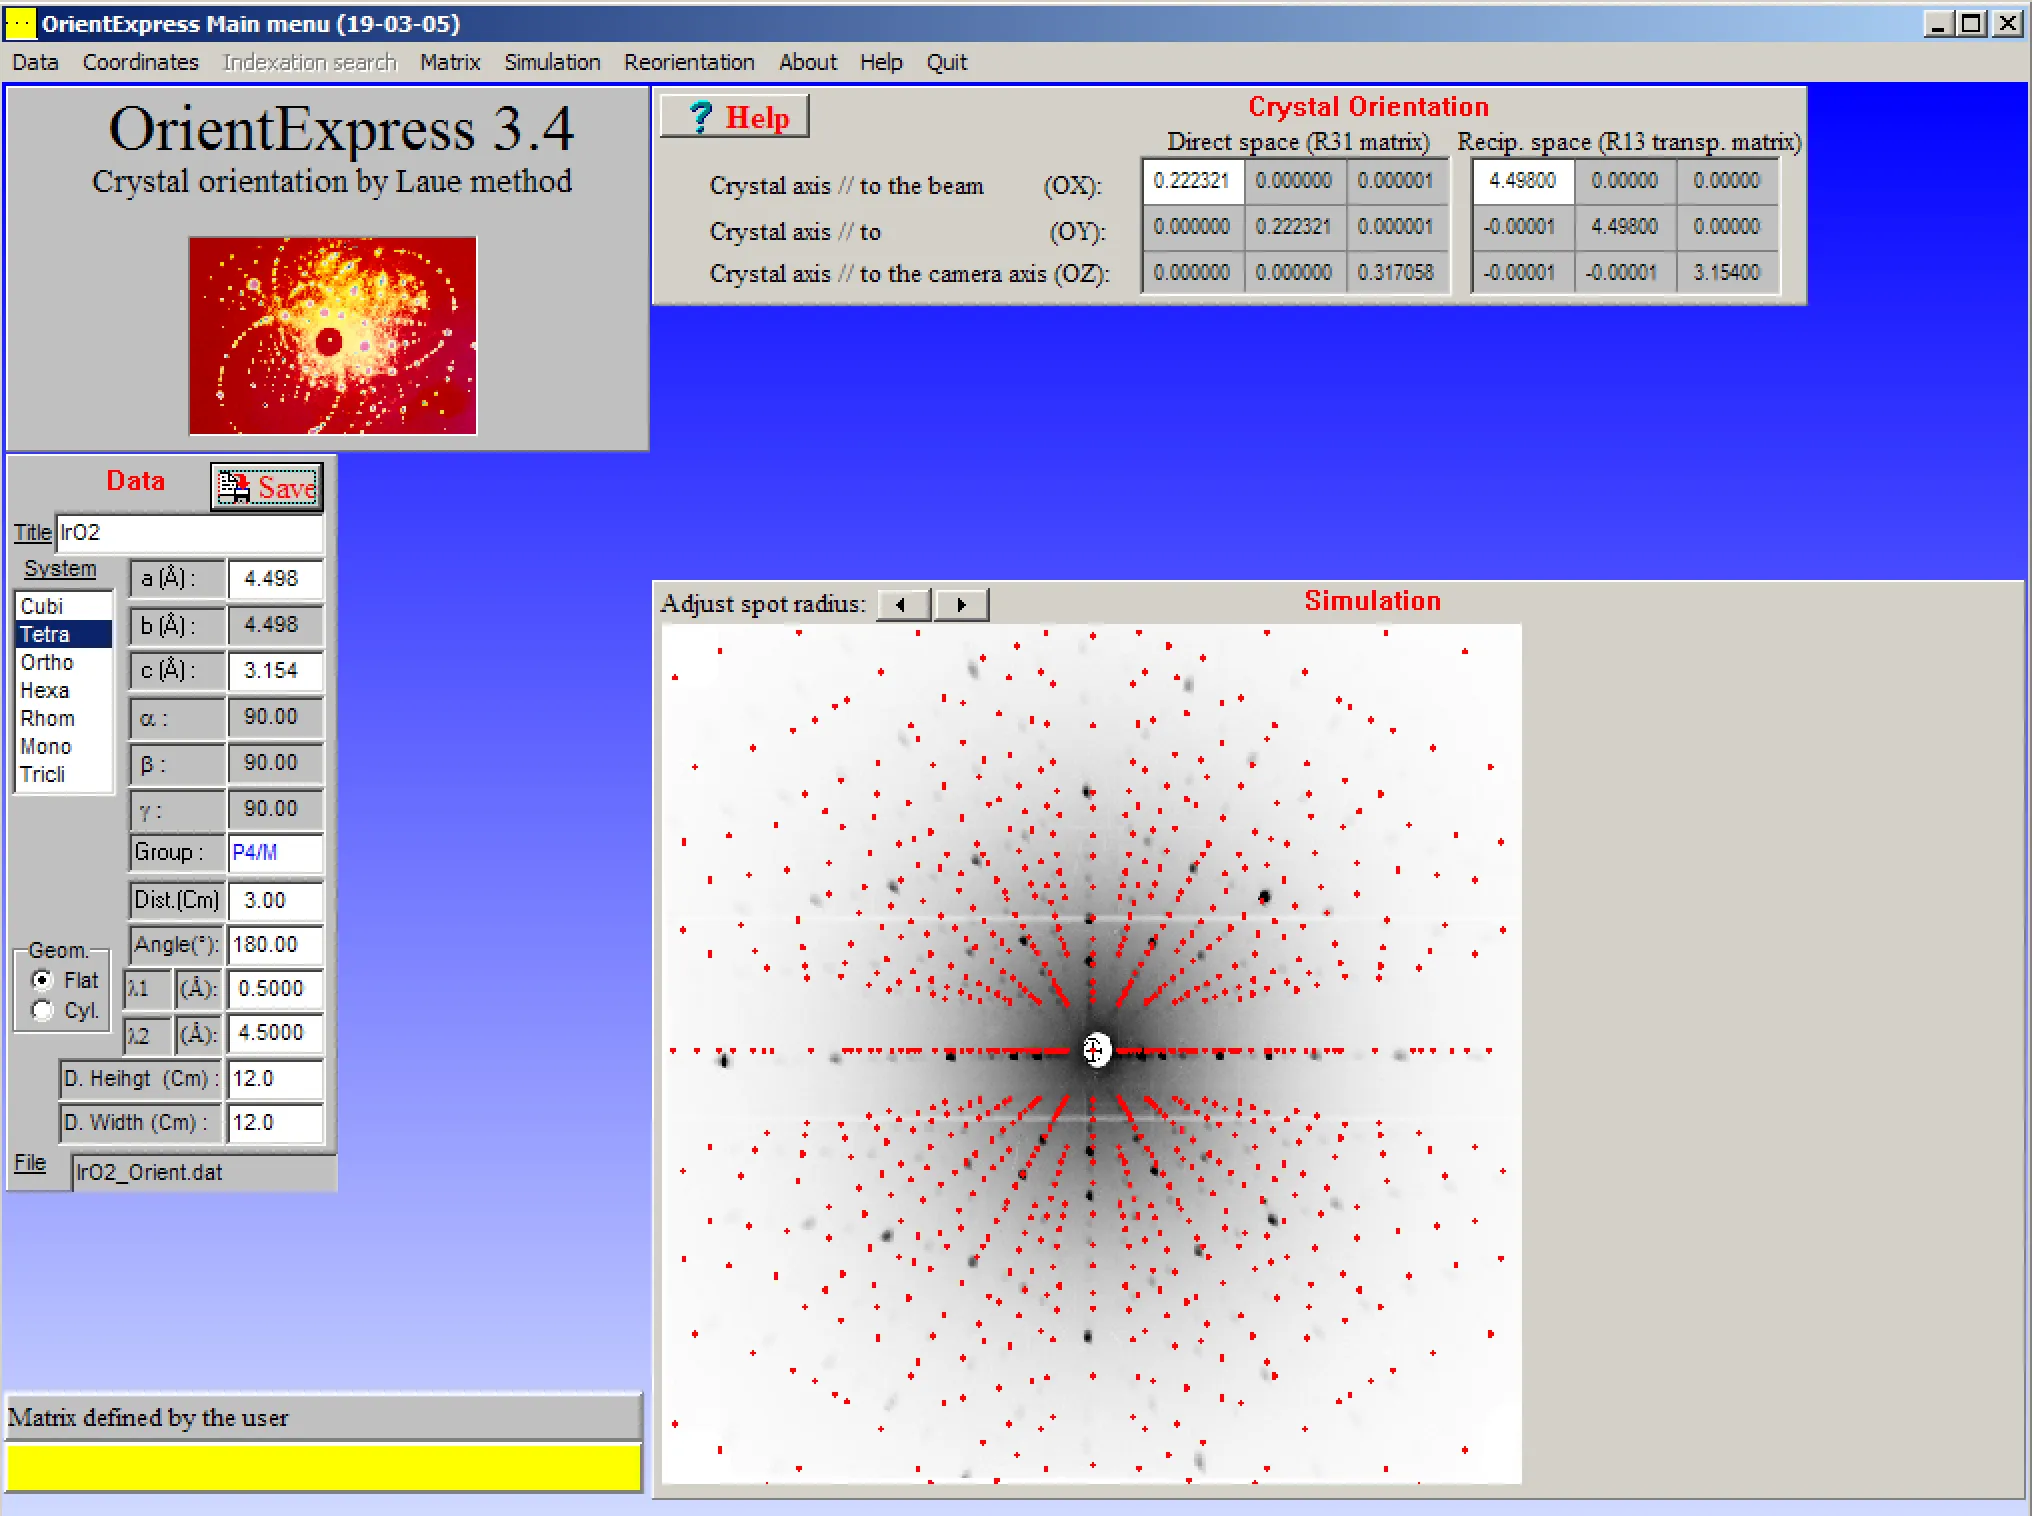
- Let’s simulate Laue pattern for IrO2 single crystal (right now I have the parameter for this compound, but you can try with any other compound). IrO2 has tetragonal crystal structure, note the respective parameters in the following window:
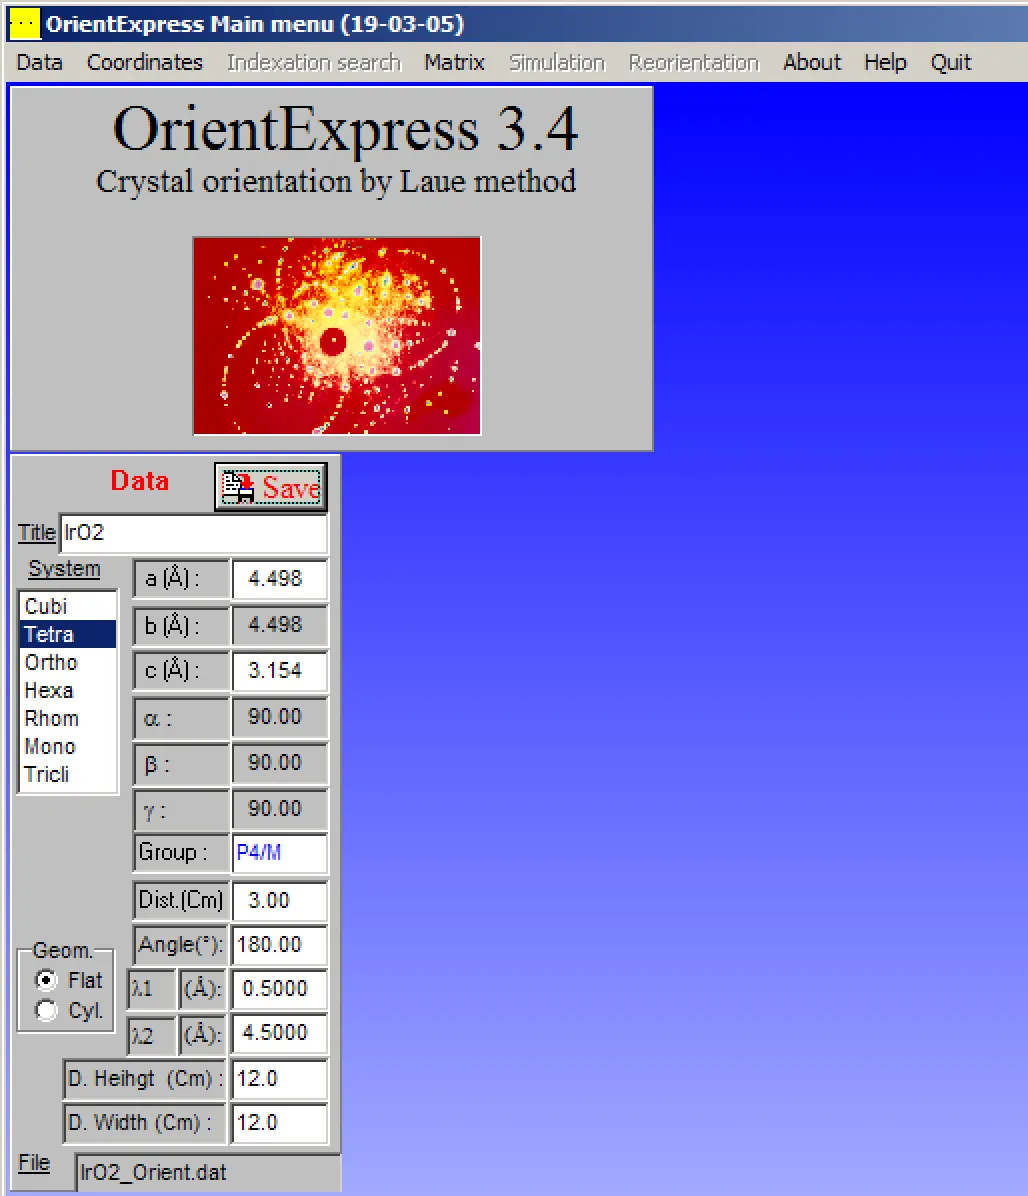
Here a, b, c are lattice constants. α, β, γ are angles between principle axes. Group is space group of the crystal structure. Dist.(Cm) is the distance between single crystal surface and Laue recording x-ray film or image plate. Angle(°) depends on the geometry of the Laue setup. In case of metals (like in our example IrO2), we record the back-scattered x-ray pattern. In this case Angle 180°. In some cases of transparent single crystals, we record the transmitted pattern, in that case, Angle = 0°. λ1 and λ2 are lower and upper limit of x-ray source we are using for the experiment. Height and Width corresponds the height and width of the x-ray recording film or the dimensions of Image plate.
You can save these data in a
.datfile for future use. Just click the Save button on the top right of Data input window.Next time, if you like to load this saved data, choose File from Data menu, and navigate to the data file.
Now we are ready to simulate the Laue pattern. First let’s see the Laue pattern for [100] crystallographic direction.
Go to Matrix » Acquisition in the menu bar. You will see following window:
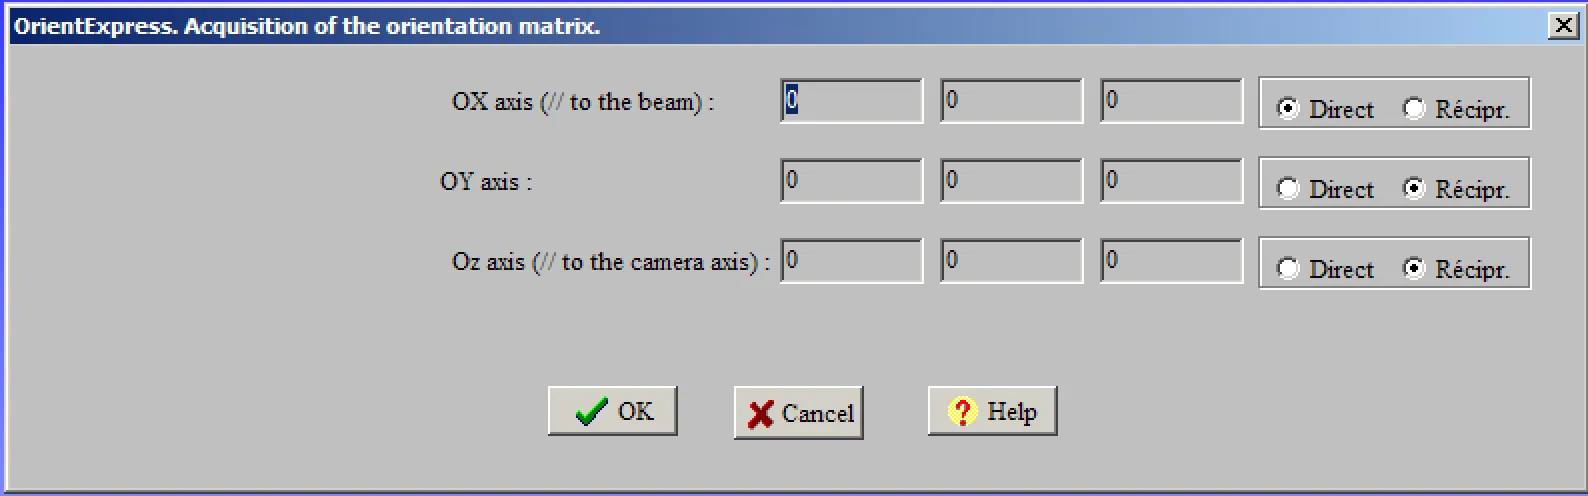
- Here we need to insert the crystallographic directions of our crystal we want to simulate. Here is an example:
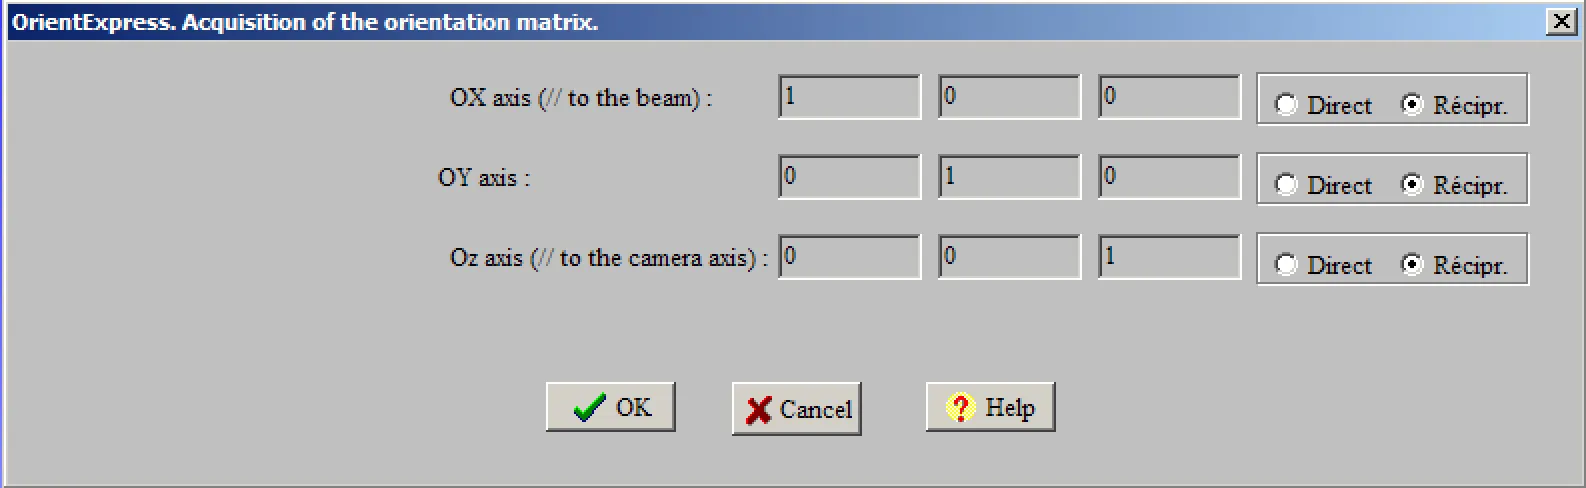
- Please select Récipr. (stands for reciprocal space). Click OK, and here it is.
Congratulations! Now you know how to simulate Laue pattern of any single crystal with known lattice parameters. Very simple, isn’t it? Now I will describe couple of useful techniques which you may find useful.
Rotating the pattern to see the changes. Go to Simulation » Laue in the menu bar.
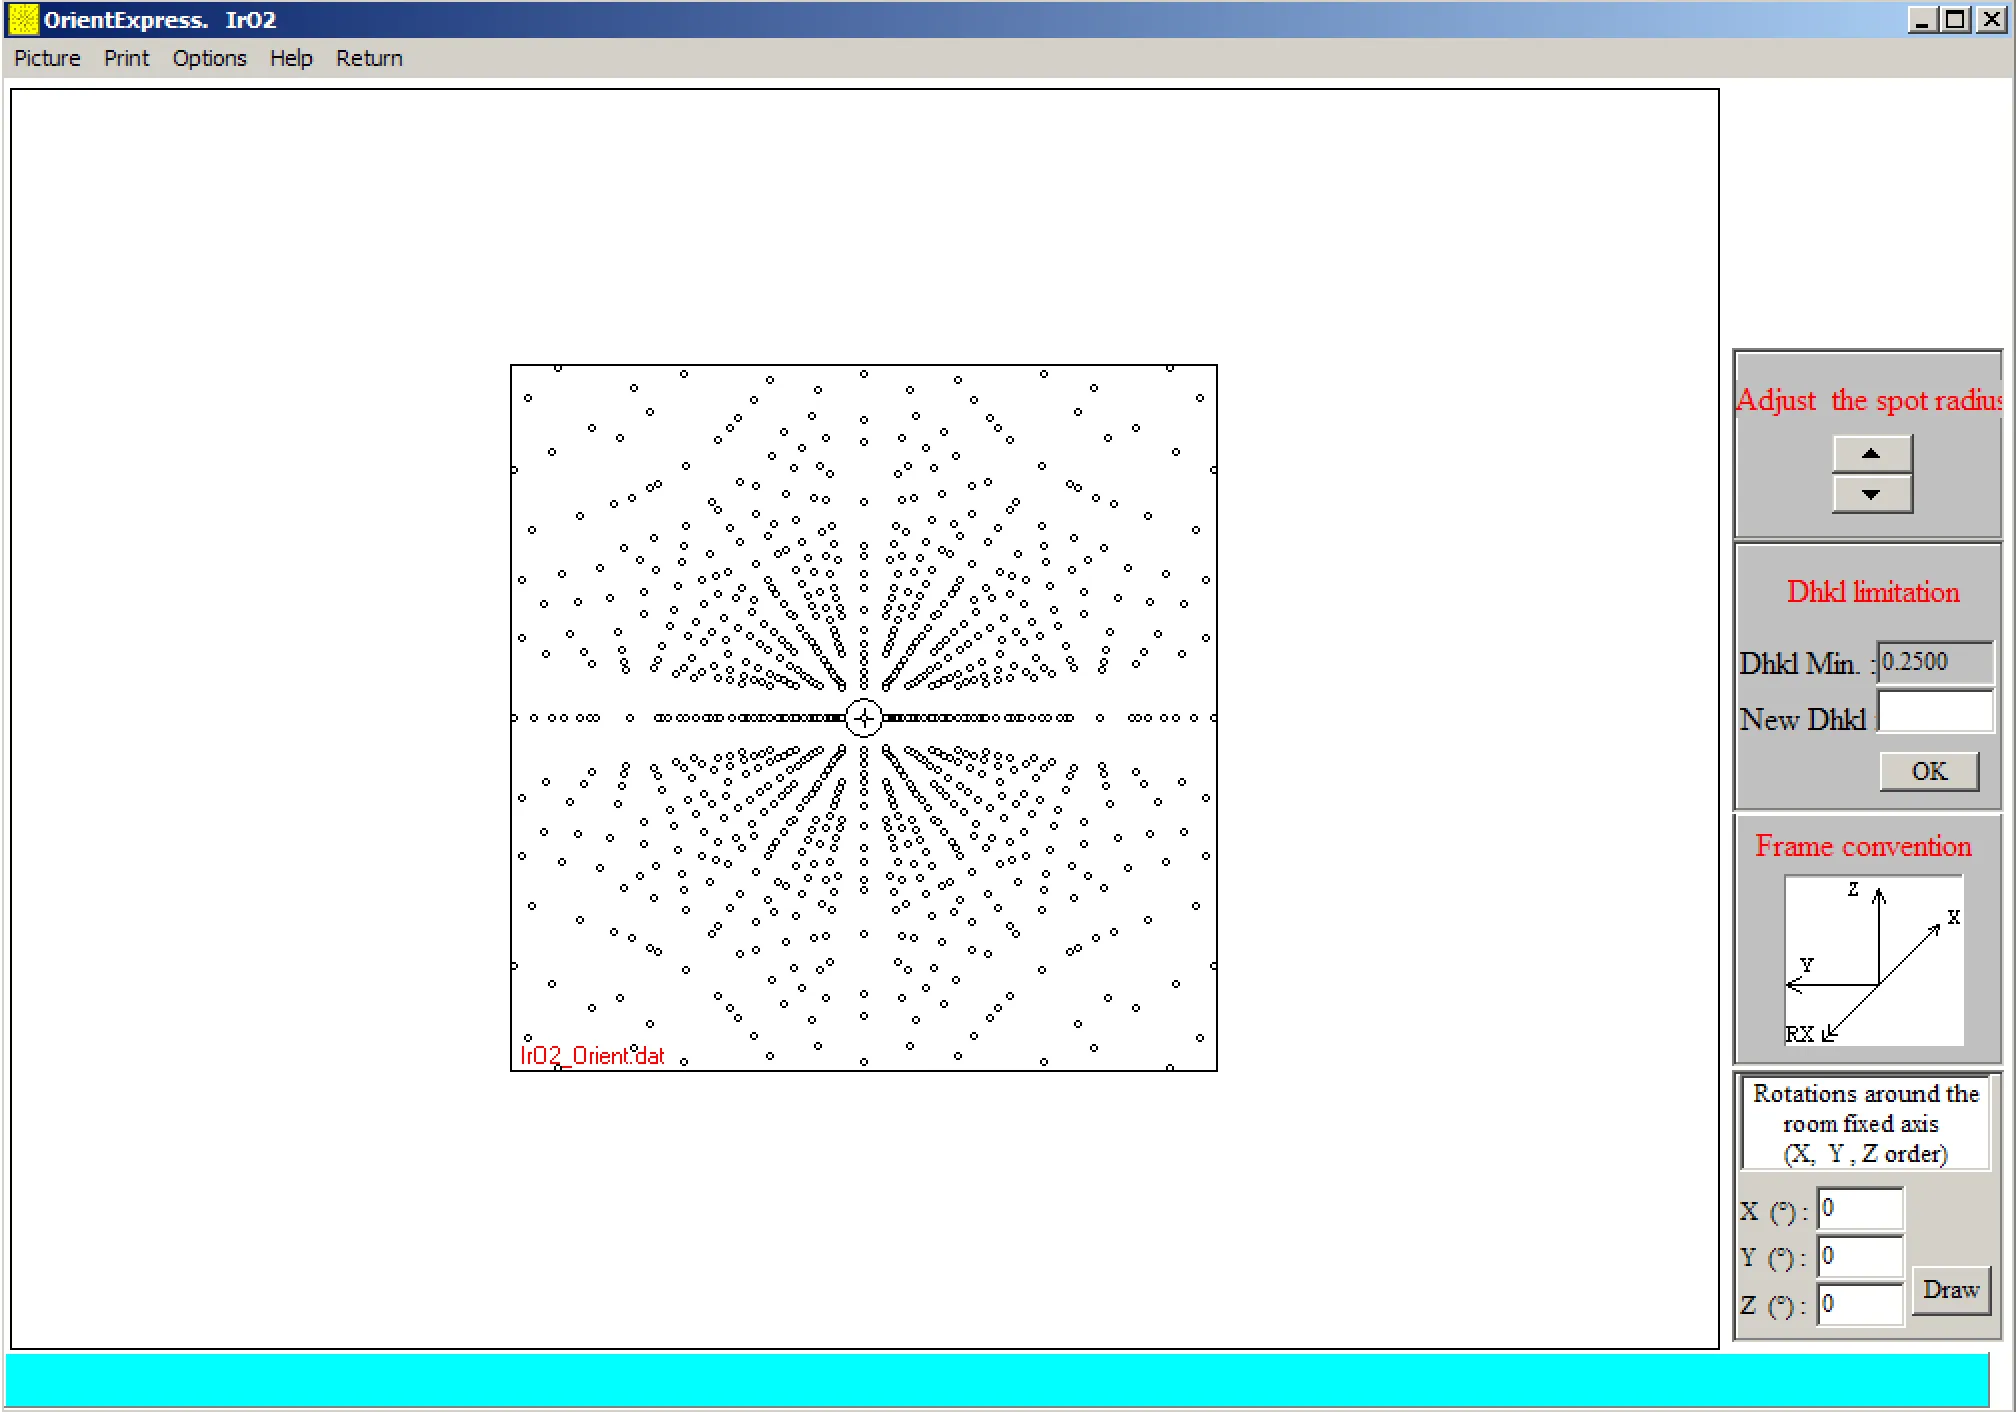
Now you can put degree of rotation with respect to rotation axes and click Draw. That’s it.
Another feature maybe be very useful: superimposing a simulated patter over the experimental pattern.
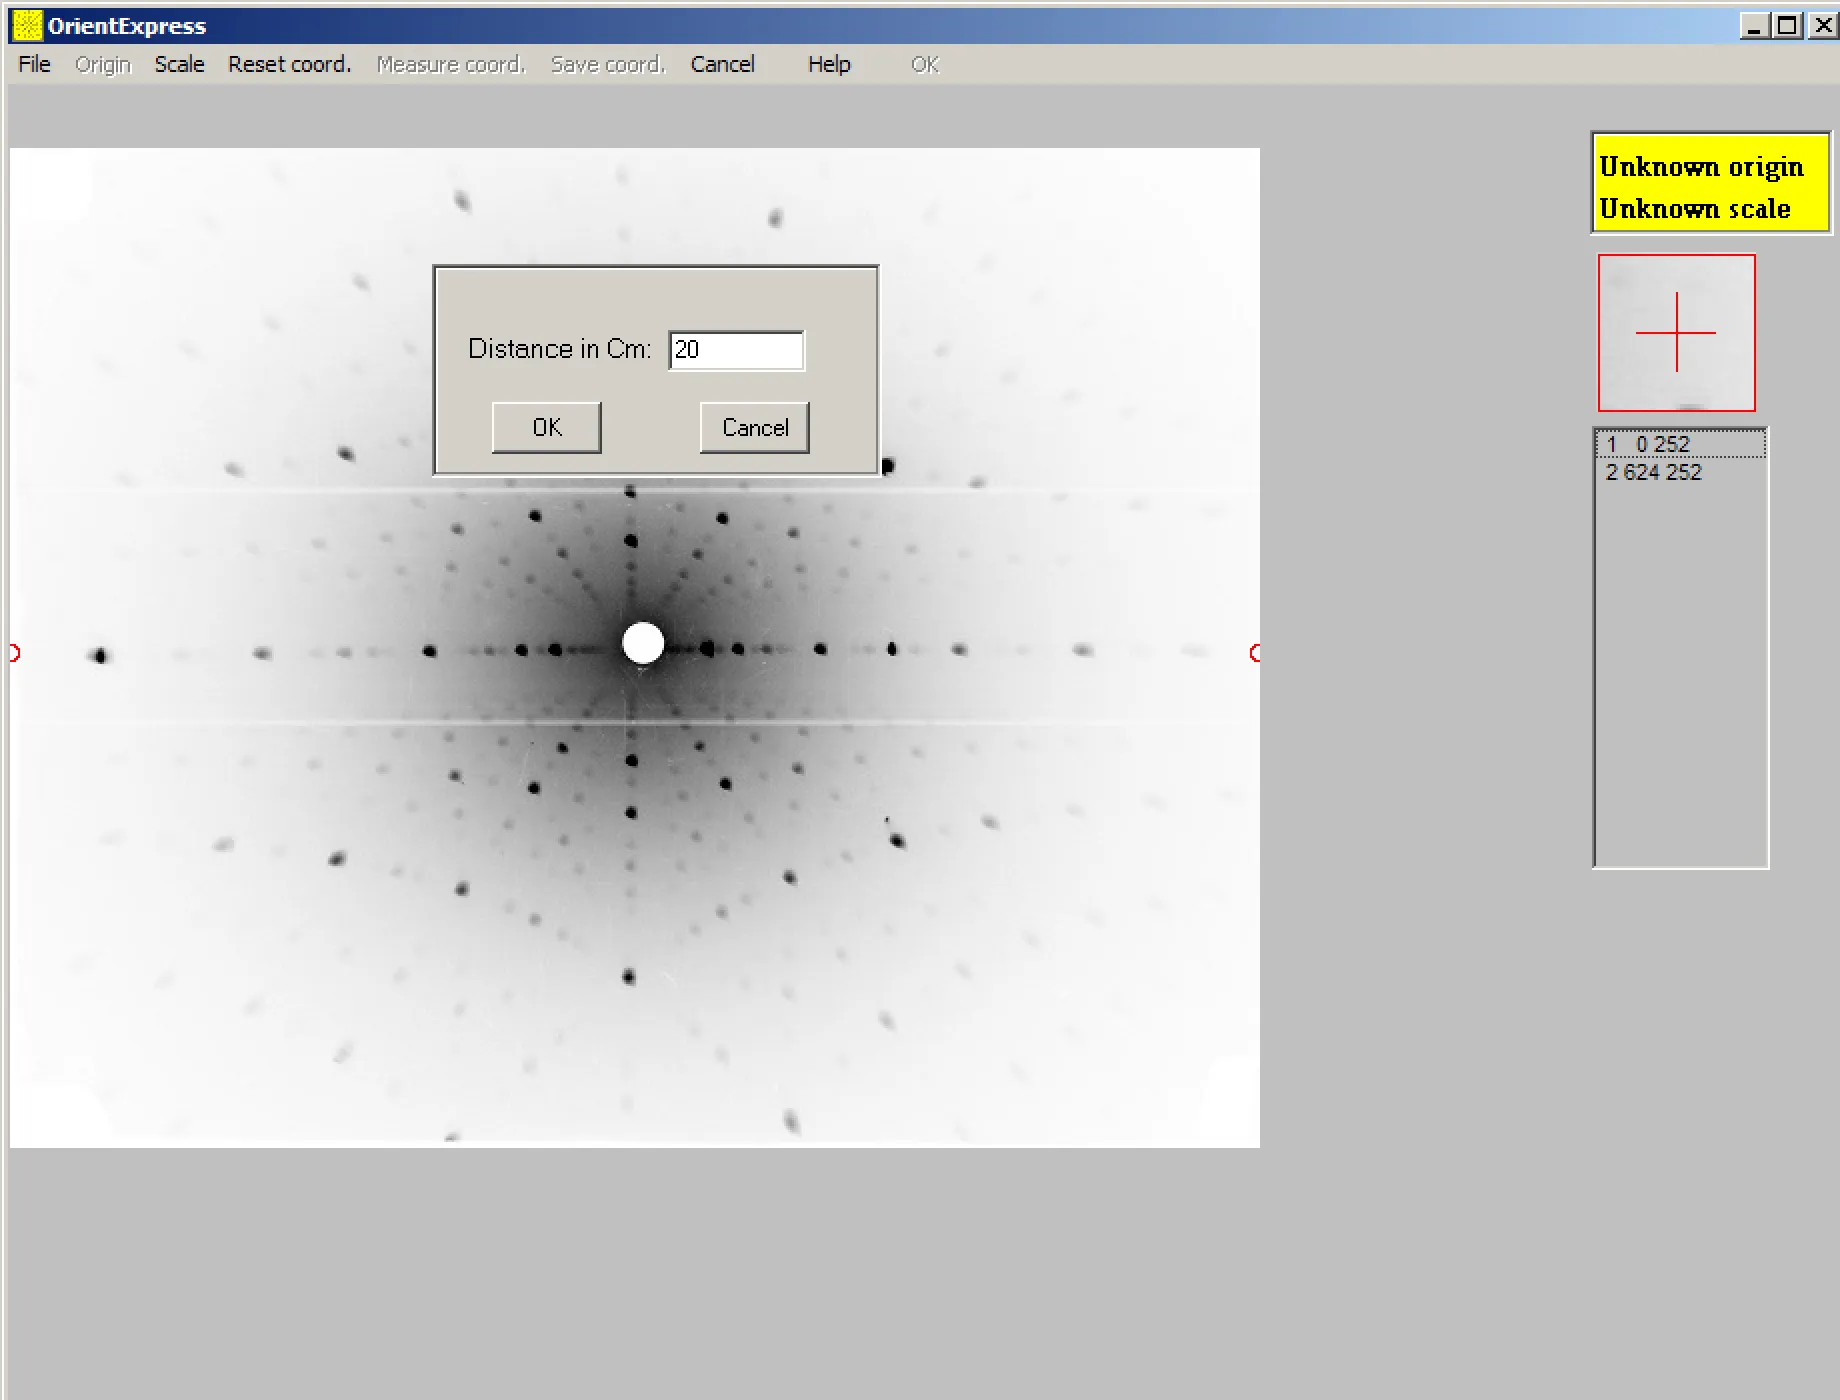
Please save your experimental Laue pattern in .jpg (or another supported format). Note: sometimes I noticed that high resolution images show some scaling problem, in that case please scale down the resolution. The image file I am using is 625 pixels by 500 pixels.
Go to menu bar: Coordinates » Image and browse your image file.
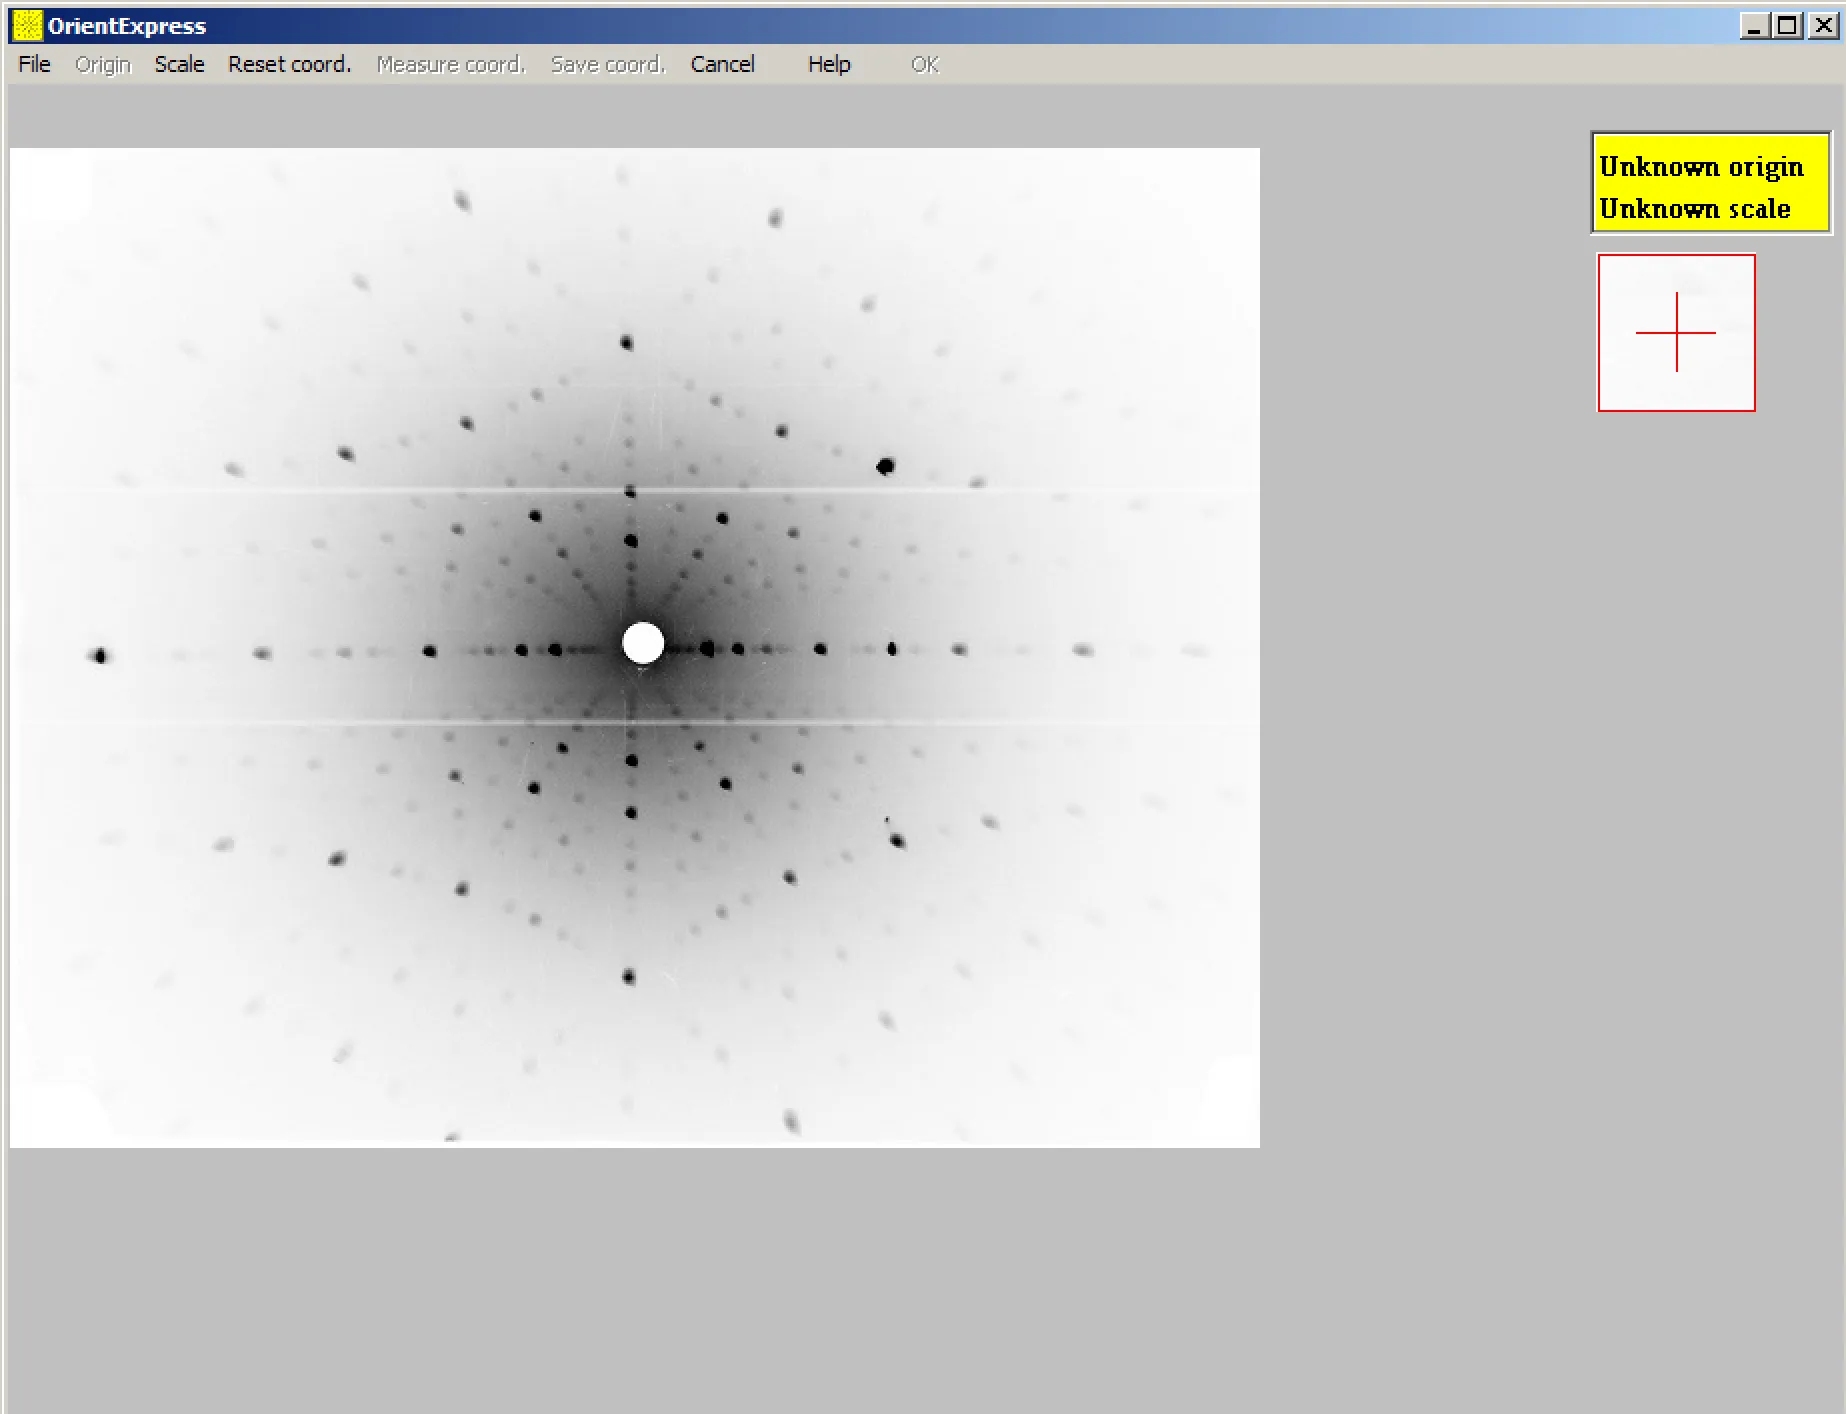
Next we need to set the scale. Go to Scale » Measure, then I click at two points on the horizontal axis and enter the horizontal dimension of my image plate.
Then we need to set the Origin, Go to Origin » Point, and click in the center of the film/pattern.
- In the main window, you should see something like this:
- That’s all from me. Now you may want to explore further yourself. Happy learning!