FullProf tutorial on fitting XRD peaks
Rietveld refinement of powder X-ray diffraction pattern using FullProf
Step by step guide on getting started with powder x-ray diffraction peak fitting using FullProf.
On this page:
Installation
Please download the FullProf software here and follow the instructions to install in your computer. I am using a Windows machine for this tutorial. The sample data used in this tutorial is available here.
Creating PCR File
First of all, it is recommended that you always create a new (separate) directory for the FullProf analysis of each of your samples. Like for example, now I want to do the analysis of CeMg3, so I will create
D:\FullProf\CeMg3Copy the powder XRD data file to the folder created (i.e., to
D:\FullProf\CeMg3). Generally, this XRD data file is an ASCII file with the extension.x_yor.ASC, containing data in two column format, it will be better to change the file extension to.dat.Now run the fullProf Program, then the FullProf toolbar will appear.
Click the WinPlotr icon to run WinPlotr.

- Then a window like shown bellow will appear:
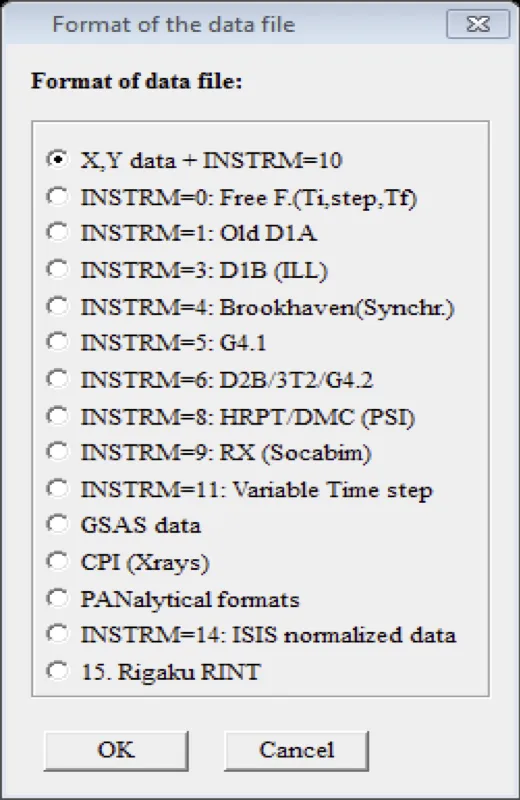
- Then go to File » Open Pattern File and select the first option X,Y data + INSTRM=10 and Click OK
Now a browser window will pop-up and you have to browse the data file (Here in our case it is
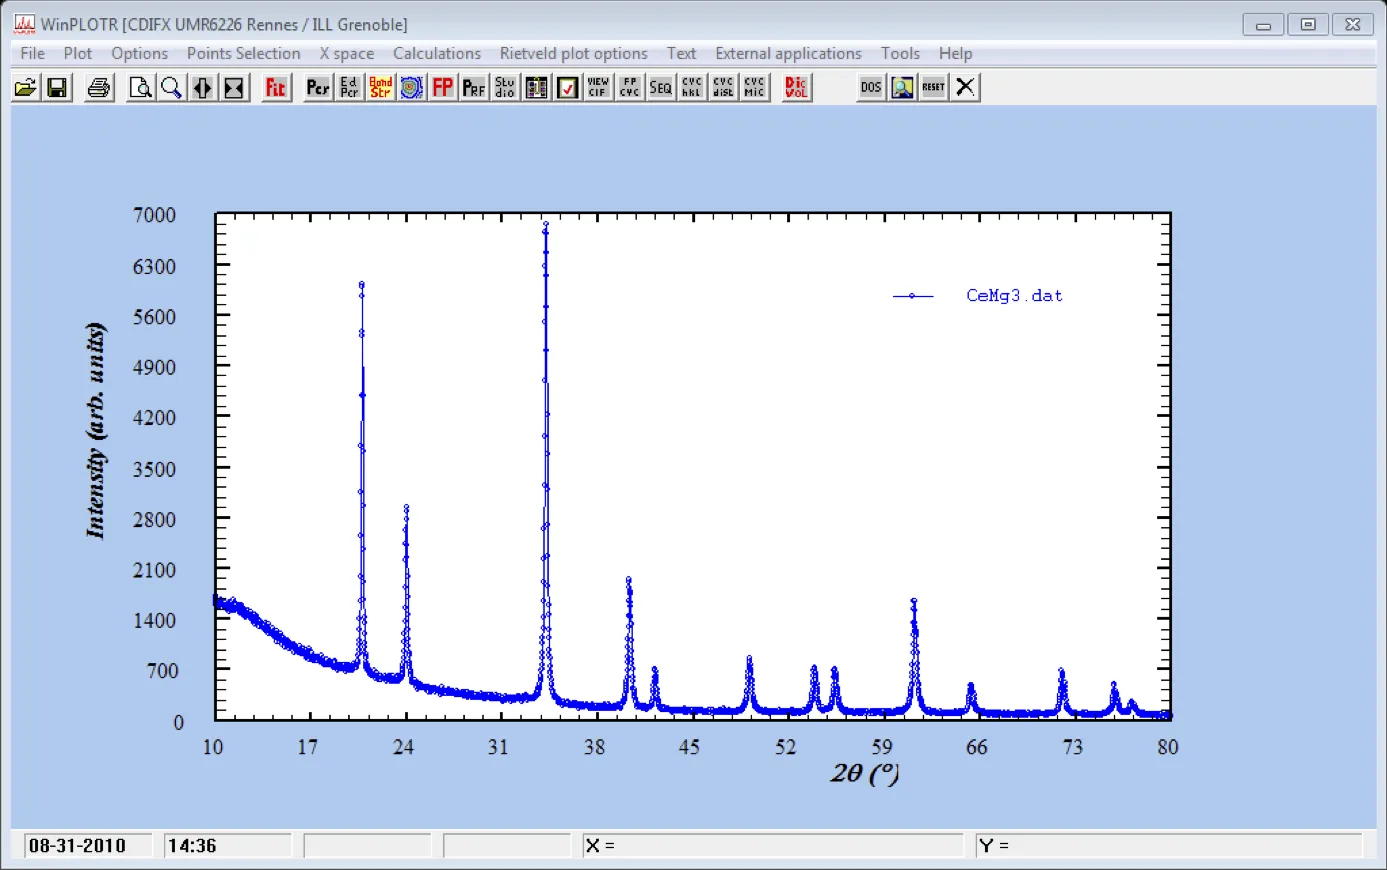
CeMg3.dat)A plot window will appear
- Go to Points Selection » Automatic Peak Search. Then following window will appear, select Search Cu Ka1/Ka2 doublets and leave the remaining parameters as defaults for the first time and Click OK.
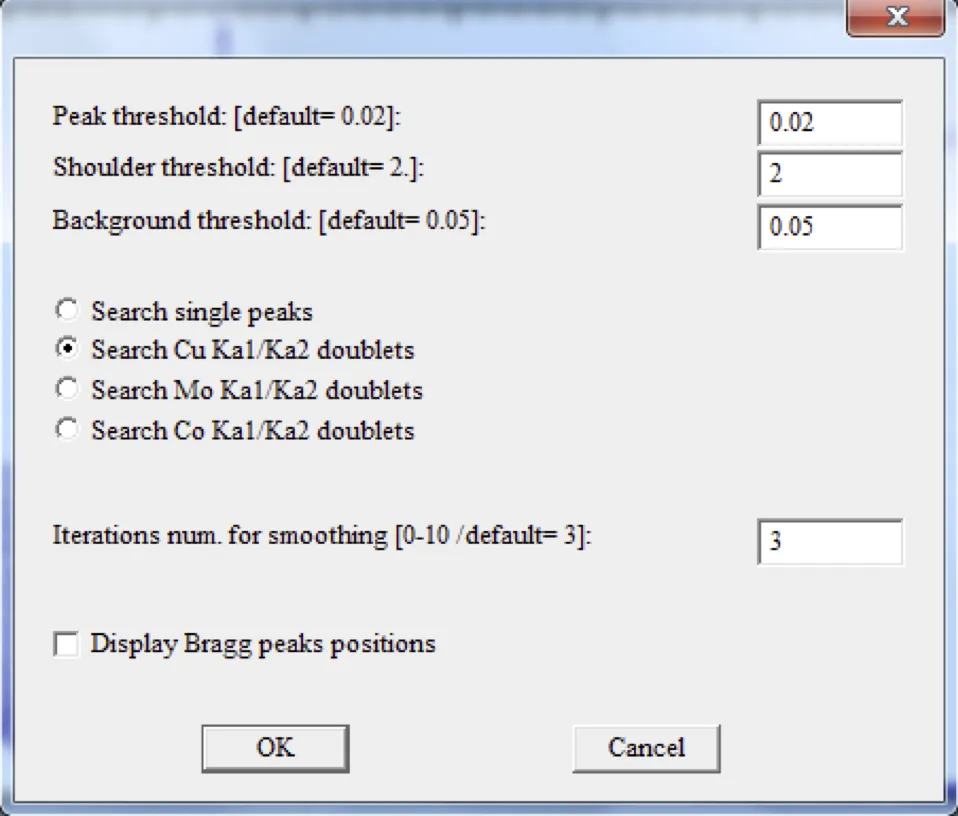
Now it will show, how many peak it has found, if the peak number is large or small, you can play with various parameters, especially Iterations num. Note: the maximum number of peak must be bellow 20.
Once you have got the right no. of peaks (say, 12 or 14), you can go ahead.
Now, you have to save this, for this, go to Points Selection » Save as… » Save Points for DICVOL06. A pop-up window will appear, put a title, select the Tested Crystal Symmetry (If it’s known, like in our case of CeMg3 it’s Cubic). And click OK.
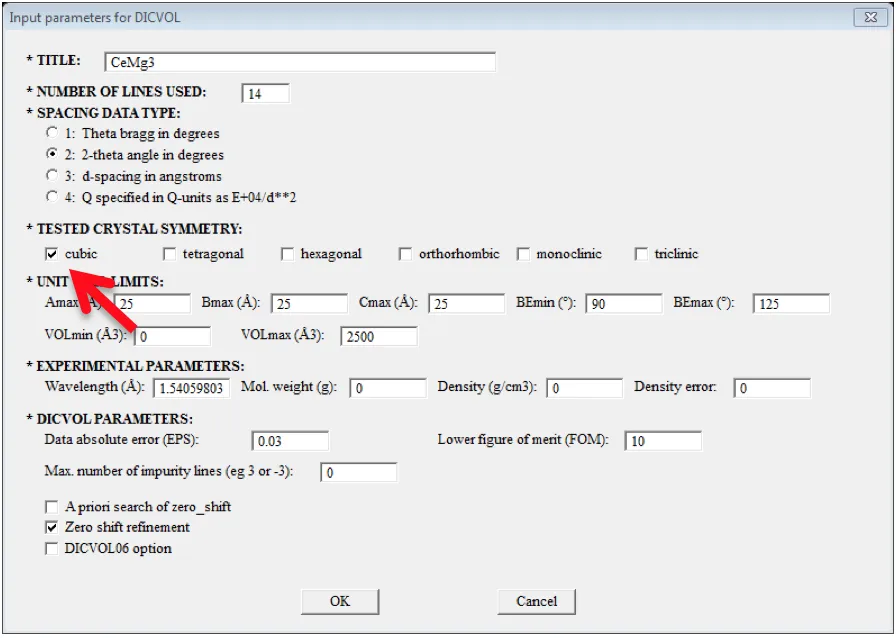
- A pop-up window will appear saying CeMg3.dic file has been created, click OK, Next pop-up will say Edit DICVOL06 input file edit? Click NO. Finally, click RUN in the next pop-up window while asking Run DICVOL06? If you get a solution, click OK.
Sometimes, it may happen that you end up with no solution, then go back two steps (DICVOL parameters) and put the maximum number of impurity peak =1 (increase it step by step if you don’t get any solution again)
After clicking OK, in the step 13, a pop-up window will say Normal end of DICVOL6? Click Kenavo!
Now the required PCR file has been created in our directory.
Editing the PCR File
Here we will use FullProf PCR Editor (Graphical User Interface) to edit the PCR file.
- Click the ED PCR button in the FullProf Suite Toolbar:

- Following window will appear:
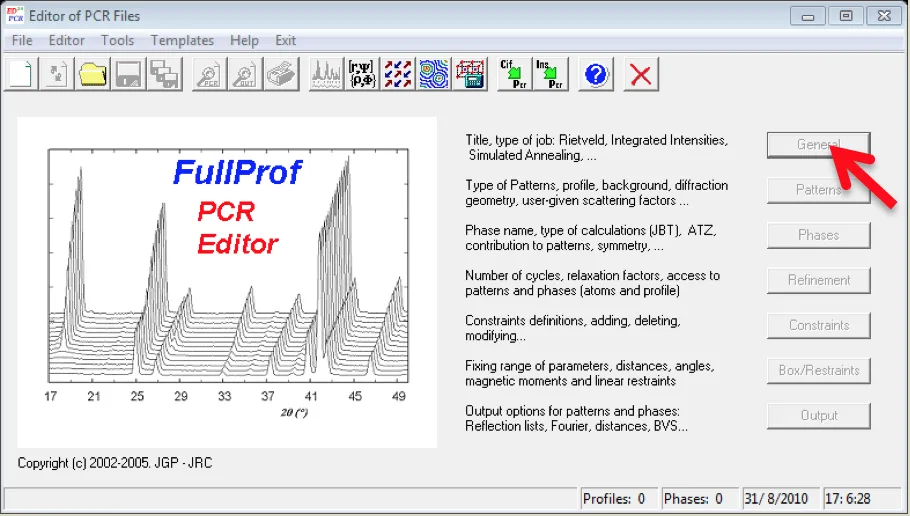
Now, go to File » Open…, a browser window will appear, browse the PCR file which we have created earlier.
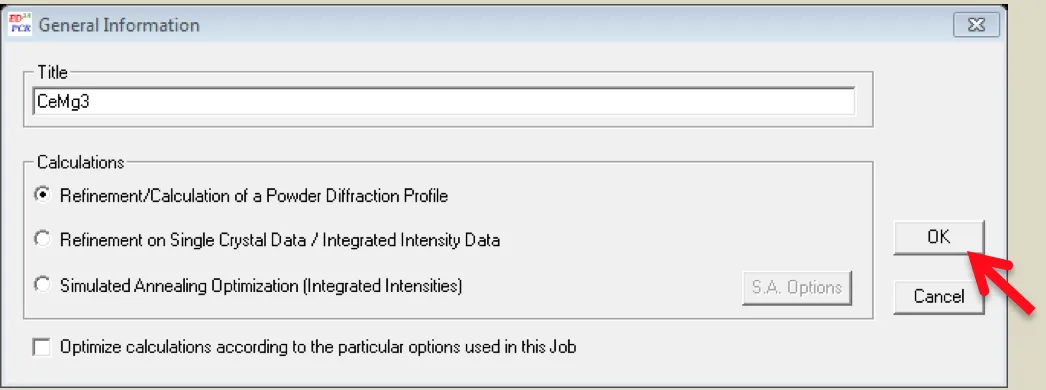
Click in the General TAB, give a title (say, CeMg3) and click OK.
- Then go to Patterns TAB in the Editor of the PCR File, following window will appear:

- Click the Data file/Peak shape button:
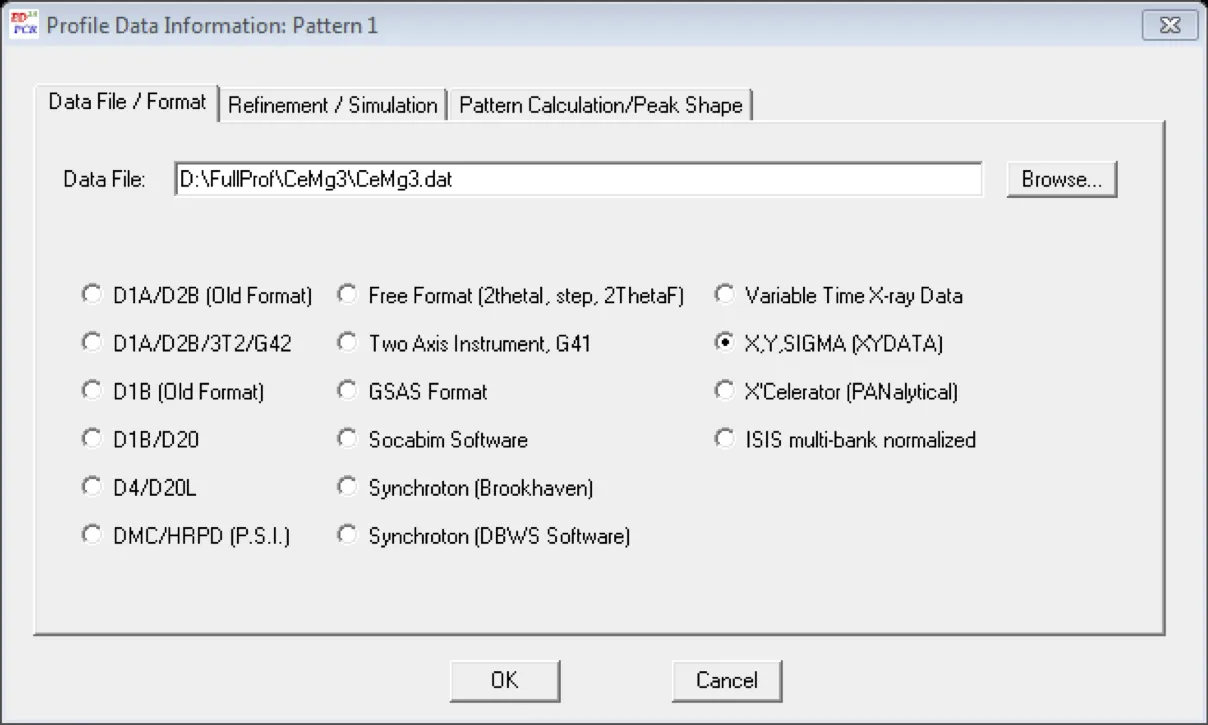
Another pop-up window will appear, in the Data File/Format TAB browse the data file, in our case
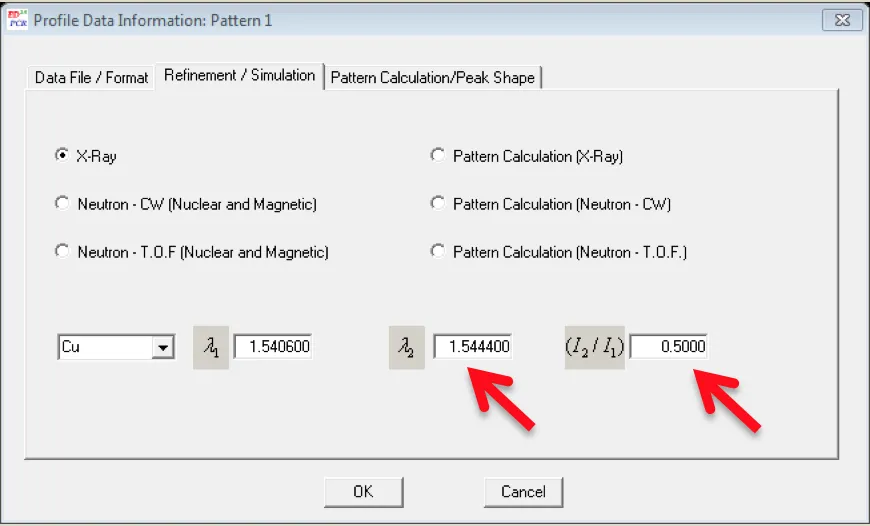
D:\FullProf\CeMg3\CeMg3.datNext, go to Refinement/Simulation TAB, put λ2 = 1.5444 and (I2/I1) = 0.5 (specific to my case)
Click OK in the Profile Data Information Pattern window.
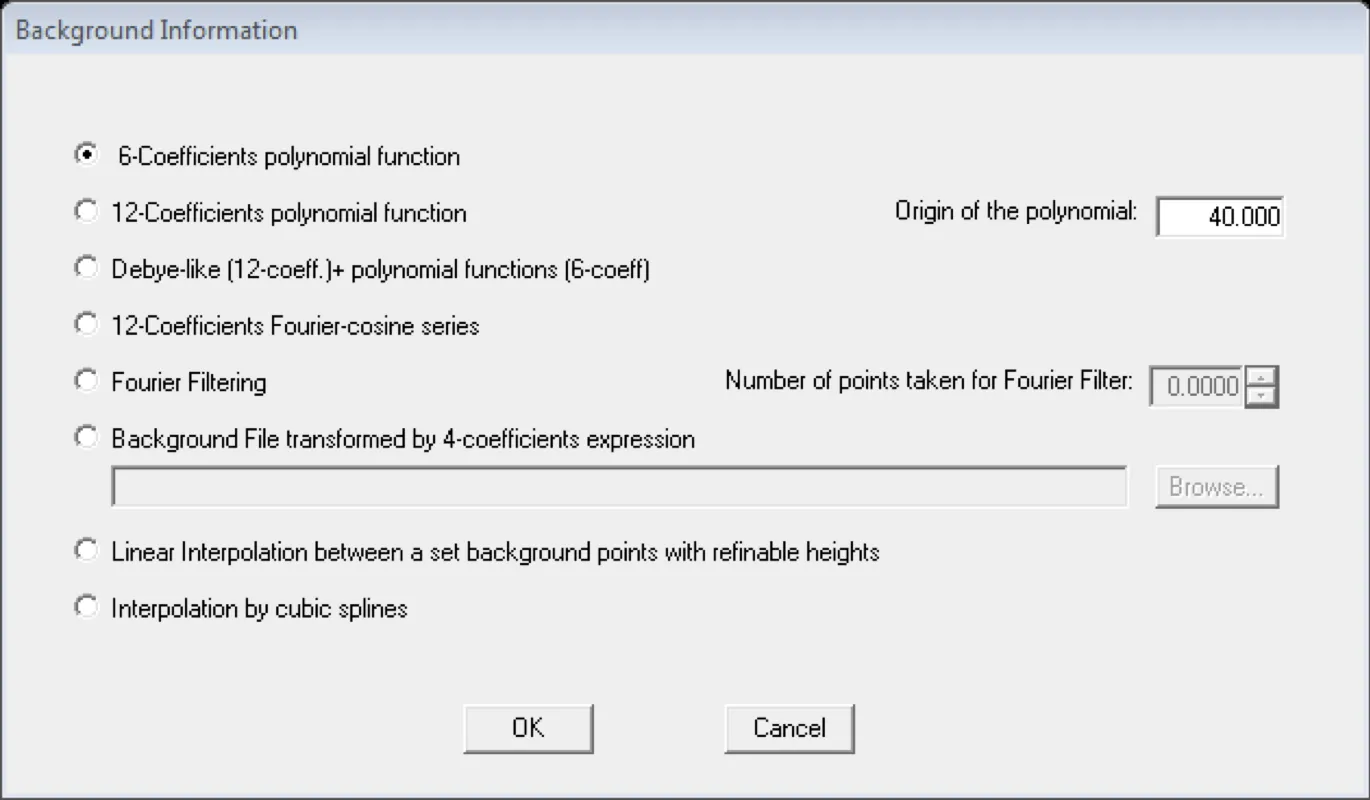
Now click in the Background Type button in the Pattern Information window, following window will appear, select 6-Coefficients polynomial function and click OK.
- Now, click in the Excluded regions button and enter excluded regions in the pop-up window, in our case, 0-10 and 80-180 are the excluded regions.
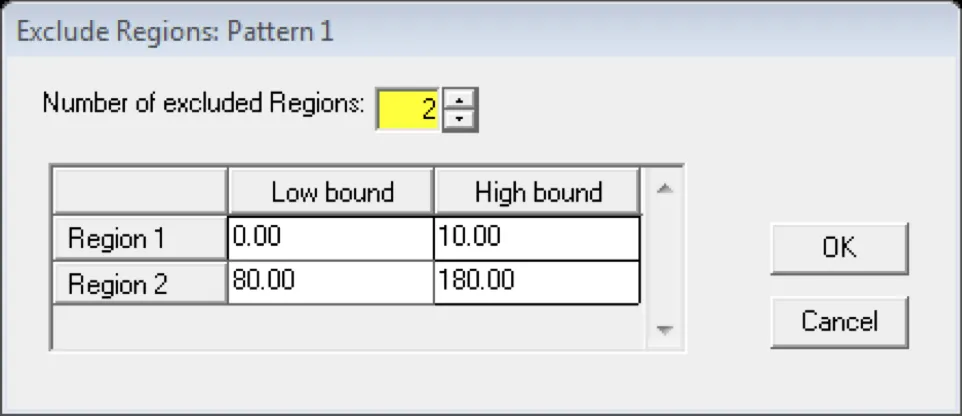
Click OK in the Exclude Regions window and in the Patter Information window.
Next, come to the Phases button in the Editor of PCR Files and click Symmetry button in the pop-up

Enter the SpaceGroup information, in our case it is
F m -3 m. Click OK » OK.Now go to Refinement Button » Instrumental button in the Refinement Information window.
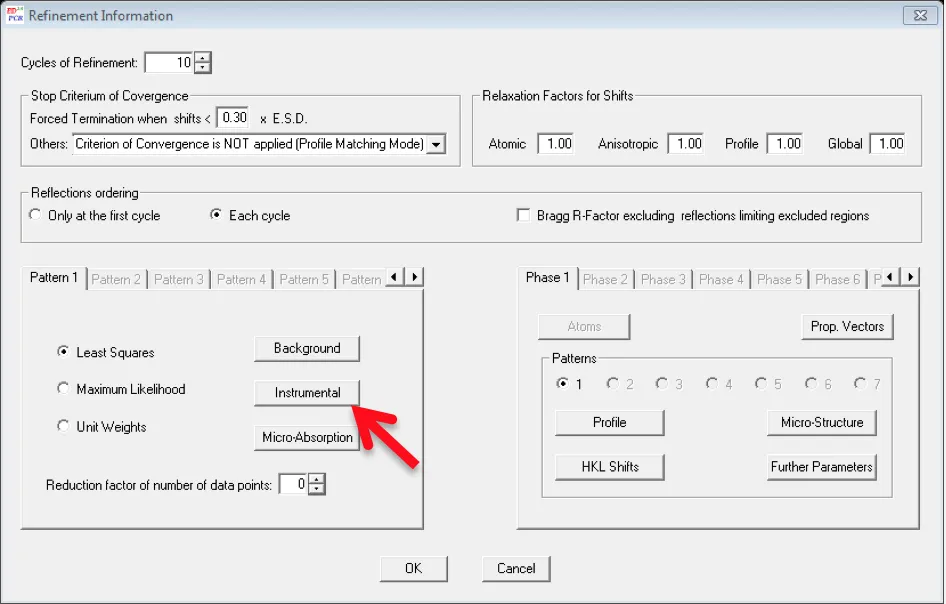
- Select the Zero Check box and click OK. First, we are going to refine only the zero point of the detector.

- Click OK » OK and come to the Editor of PCR Files window, go to File » Save. Now you can exit the Editor window.
Refinement
Here we will learn how to do the basic refinements
- Run the Winplotr by clicking the WinPlotr button in the FullProf Suite toolbar.

- Click the Pcr button to browse and open the pcr in a notepad.

- Now, the pcr file will open in NotePad, put Aut =1 (Doing so, you don’t need to put the index of refine parameter manually).
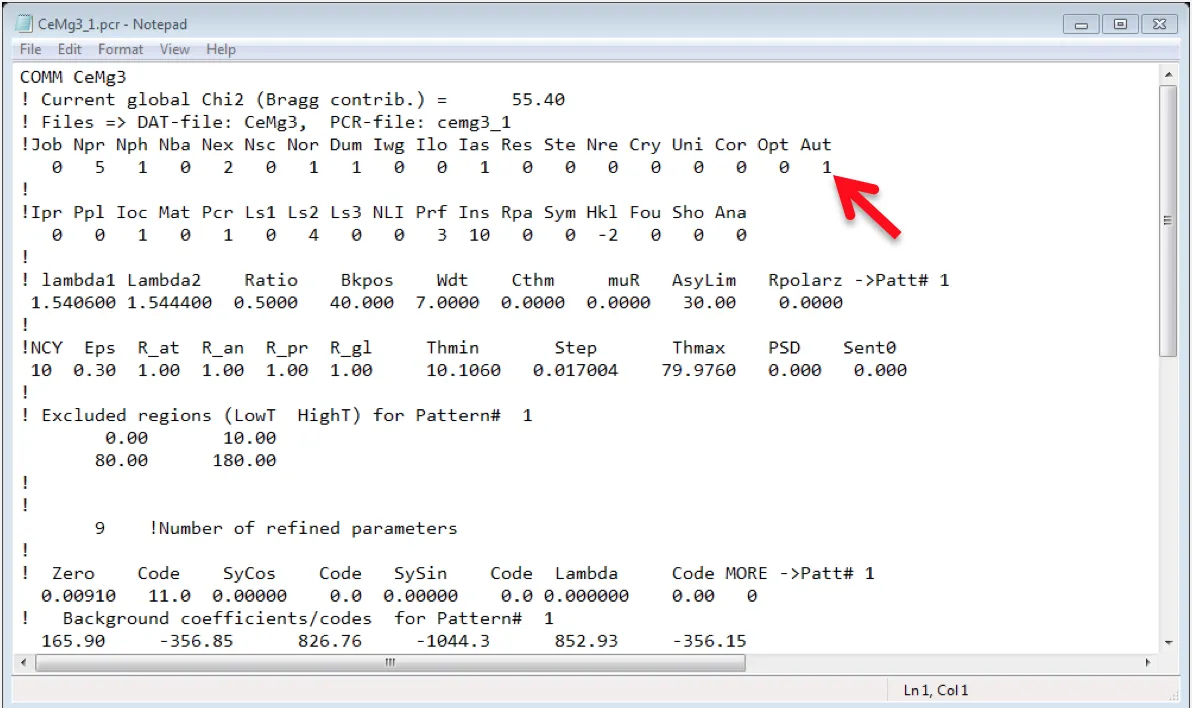
Save and Close the NotePad.
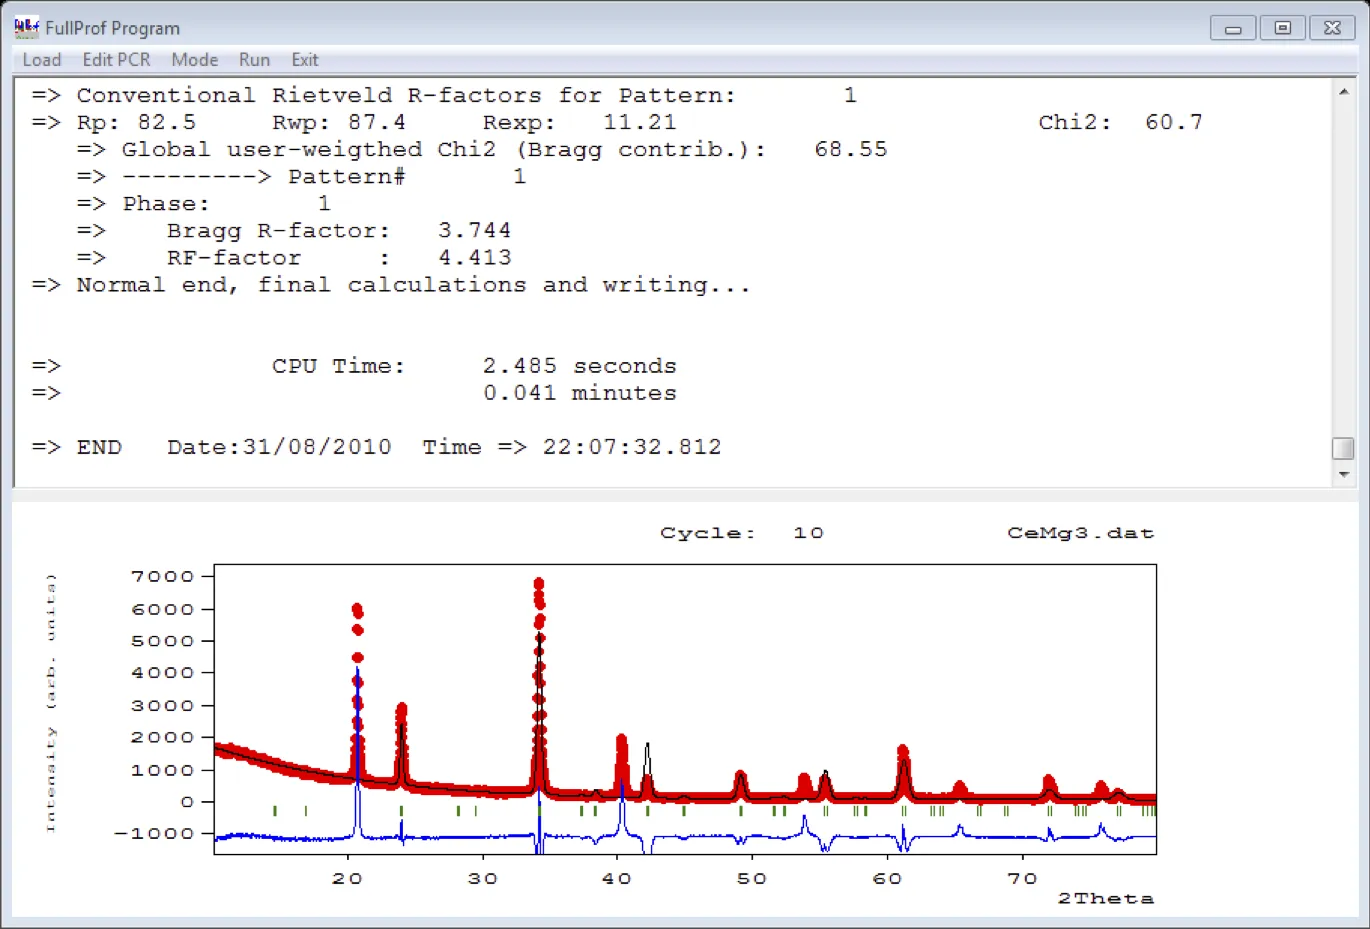
Click the FP button in the WinPlotr toolbar, it will ask for the pcr file and the data file, browse those files.
Then it will show the fitted pattern as well as the experimental pattern. It will also show the value of Chi2, recall that for the first time we are only varying the zero error of the instrument.
- Go back to the Pcr button and open the pcr file in NotePad to edit it. This time we will refine the background parameters one by one. For this change the value of 1st background parameter to 1 instead of 0.
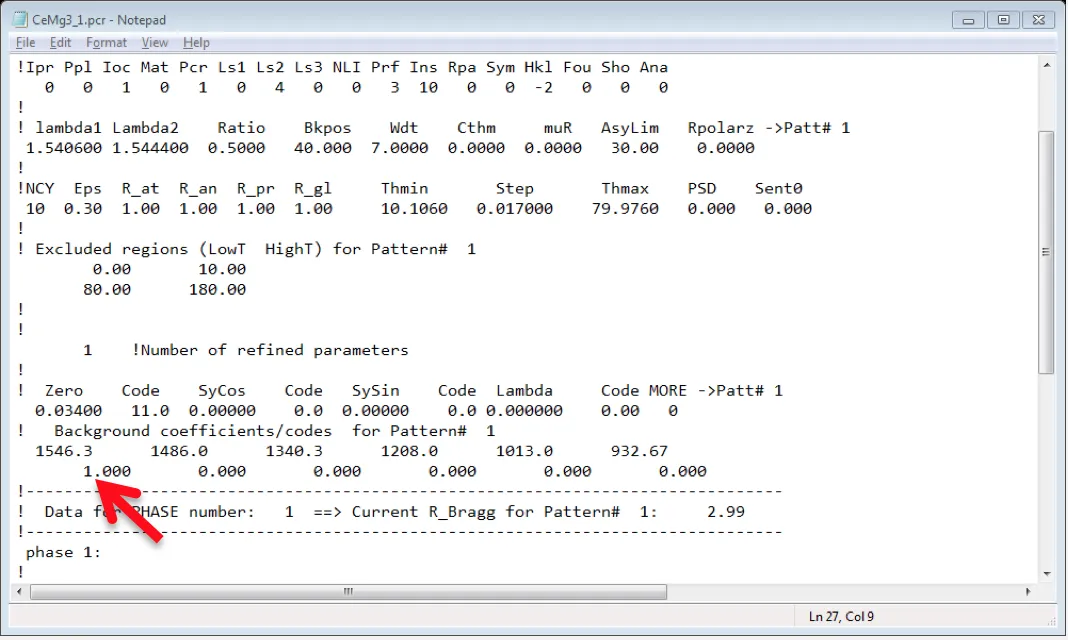
- Save and Close the NotePad and run the FP again, like this we can refine all the background parameters, generally one can maintain following order for best results: (a) Zero Point of the Detector, (b) Background Parameters, (c) Lattice Constants, (d) Atomic Positions, (e) Debye-Waller factor, (f) Peak Shape, and (g) Asymmetry Parameters.